
Fast forward to today. We have moved five times in our five years of marriage. All of our furniture choices remain the same as I still sit on the same couch we purchased the first year we were married. A few additions have been made, a new television when one broke, a hand-me-down crib that we painted for our sweet little boy, garage sale finds and thrift store gems.... one thing remained: a table that never gets eaten on that can only afford two dinner guests. So what could be done? Obviously buying new was out of the question since other necessities remain.
Enter Pinterest's ever evolving ideas and these nifty little pinsperations.


Even with such great ideas, these inspirations didn't change the fact that we had pocket change to spend on comfortably seating eight to ten guests at the drop of a hat. So the ideas churned and we discovered the ever-popular trend of re-purposing unwanted palettes. The key word being un-wanted. We did not steal or disguise ourselves in the wee hours of the night in order to obtain lumber. We drove around during the day, called stores, and did it the honest way. No, I'm not going to tell you where we found our stock because we have lots of building projects ahead! Okay, maybe I will... if you're nice.
After obtaining the right size palette that we wanted to base our table off of, we then began to collect any and all salvageable extras so that when it came time to rip into them, we would have enough for an actual table top. Research and learning from other blogger's experiences helped us understand the art of working with palettes - you'll need way more lumber than just the dimensions of your finished product. Our table took three LARGE deconstructed palettes, when in fact it could have easily been constructed with the lumber from just one and half, had they been in pristine condition. But where's the fun in "looking new?" We wanted old, used, beat-up, and rugged. And that's exactly what we got. For FREE!
Without further ado here's a quick little tutorial to wrap up 20+ hours of our husband and wife table attack. Hi-yah.
1. First we obtained the necessary lumber and then some. Three times the amount needed is what worked for us, but living in the sunshine state, anything left outdoors tends to take a beating, via rain or heat.
2. Then, we deconstructed only surface slats, as seen below.

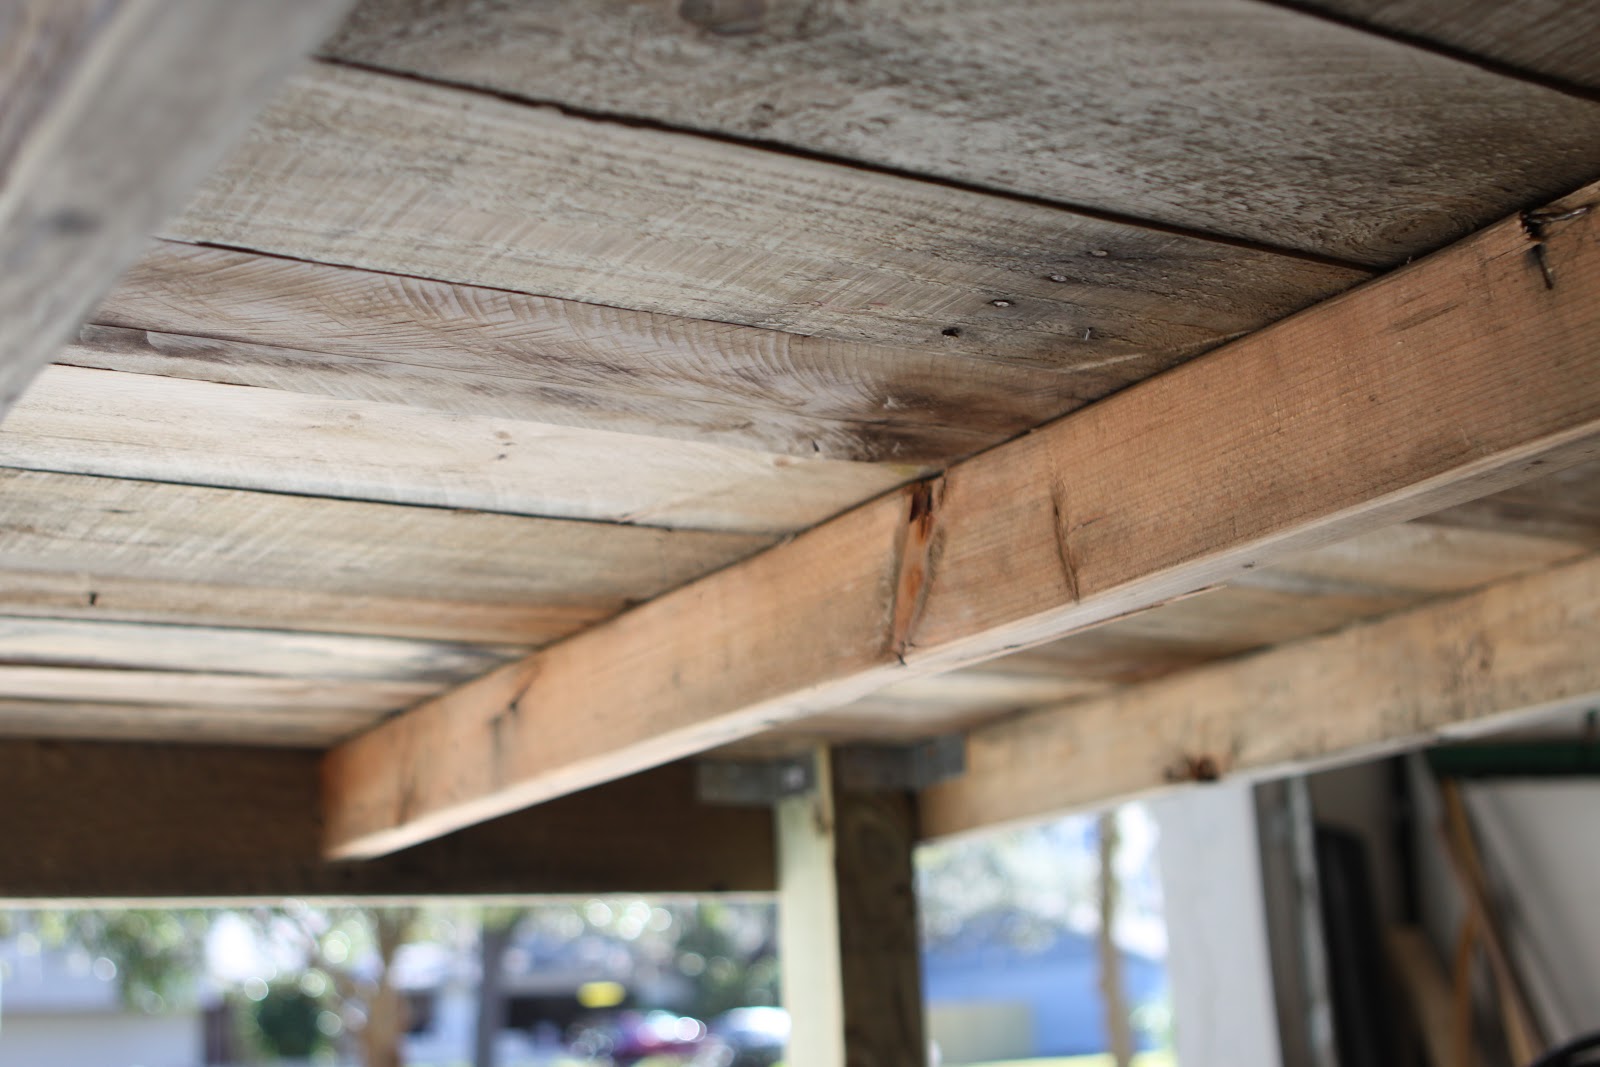
Again, after reading other blogger's trials, we learned to use a saw-zall instead of trying to pry the slats from the supporting perpendicular beams. Pete simply took the saw-zall to the nails, leaving our three palettes looking like this and this:


3. Once deconstructed, we decided which base looked sturdiest and went from there. Pete stripped all three palettes of their top layer of shorter-length slats (where sod or other palette-hauled merchandise would sit).
4. Then we began to process of choosing which of said slats looked better for the wear. Then we placed the slats along the base we chose. Believe it or not, they lined up PERFECTLY and we only ended up having to do minimal trimming at the end. Miracle number one.
5. Then the tediousness that is the hand-sander began. First we started out with a rougher-grit to get rid of the gnarlier slivers. After that I took two runs over all the slats and base with a finer 150 grit. With my need to perfect a smooth surface, this took hours, but I had little chubby baby hands on the brain and wanted to protect those sweet fingers. I also took careful measure to remove as many loose or protruding nails.
6. Once the took-forever-sanding step was done-zo Pete proceeded to use a compressor-powered nail gun to adhere the table top slats to the base. Cue the Tim Allen manly grunts. He felt super awesome and so did I using the thing. At this point, our little, well big table looked like this.... pardon the poor iphone quality. I was took excited to grab the real deal.

7. After this it was leg time. The scary part. The pass or fail part. To best show how we attached the legs, here's a few photos. We used a combination of:
- 1.25 inch dry wall nails, since they have a little rigidity to them and will hopefully hang on a little better. They were used in 3/4 of the leg attachment process.
- Super short screws for the heads of the table underneath - pictured in the first photo on the far left group of four screws. We switched it up for only these four adhesions since the nails would end up going through the wood.
- Super long screws to be screwed into each corner four times on the outside of the table, pictured last. Screws also added a little bit of durability to the structural integrity.
- Metal L reinforcements as recommended by our helpful hardware store worker. Here's what she looks like underneath.


8. Once the majority of the elbow grease was put in, we went ahead and sanded her down once more time, just for the safety of chubby baby fingers. Here's a cute couple snap shots of us in all our saw dust glory.


9. From here it was smooth sailing....har har. The next step was definitely the most fun and by far the most rewarding. Stain time! Since we were going for a more "reclaimed" look, we decided to go with a clear polyurethane sealer so we'd get that nice wet but not too new look.


Needless to say we are pretty pleased with ourselves having never DIYed anything, unless you call slapping paint on a wall DIY. She's a nine foot long, 3 1/2 foot wide miracle.
Here's our budget breakdown:
- Eight $2.50 metal brackets - $20.00
- a box of drywall nails - $4.00
- more nails for the nail gun - $4.00
- stain - $11.00
- 1 twelve foot long 4x4 for the legs $20.00
- 2 packs of hand-sander size sandpaper - $6.00
- 16 mini screws - $0.60
- TOTAL = $65.60 + some change. Pretty awesome right?
Now comes to adventure of finding an eclectic set of eight chairs before Thanksgiving, since we plan on hosting it this year. Here's to big tables, more than two dinner guests, and our very first and very successful DIY project! Chair #1 = $2.00, hopefully the rest will be as affordable. Garage sales, I'm on the prowl.

1 comment:
Love, love, love! :) Totally YHL worthy!
Post a Comment